Windows automatically creates an Administrator account with elevated privileges during the installation process. We mostly need to access it to perform tasks limited only to system Administrators. These are tasks performing which result in the UAC asking for confirmation even if you are using an account with administrative privileges. The elevated Administrator account is disabled by default in Windows 7, Windows 8, Windows 8.1 and Windows Vista.
To activate it, you need to use any one of the the following simple methods.
Important: It is recommended to only use this account for troubleshooting purposes and disable it once the task is complete. Even if you do leave it enabled, protect it with a strong password to prevent unauthorized access.
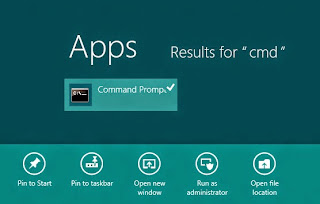 1. If you are on Windows 7, go to Start>Programs>Accessories and right click on Command Prompt and select Run as Administrator. Windows 8 and 8.1 users, search for CMD on the Start screen and in the results returned, right click on Command Prompt and select Run as Administrator.
2. In the Command Prompt, type and execute the following command.
3. You should see a message indicating that the command was completed successfully.
4. Upon logging out, you will see the Administrator account available on the login screen.
Disable the built-in Administrator account
To disable the Administrator account, type execute the following command in Step 2.
This will disable the Administrator account and it will no longer appear on the login screen.
 1. Press Windows key+R to open the Run dialog box.
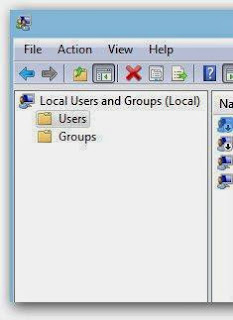
2. In it, type lusrmgr.msc and press Enter. This will start the Local Users and Groups Manager.
3. In the Local Users and Groups Manager, click on Users in the left hand pane.
4. Then, in the work area on the right side, double click on Administrator.
5. In the following dialog box, uncheck the Account is disabled option and click OK.
6. Administrator account will be immediately available on the login screen.
To disable the Administrator account, check the "Account is disabled" option in step 5.
This method will only work if you are using Professional or Enterprise editions of Windows 7 and Windows 8(.1). If you are using home and basic versions of these operating systems, this method will not work for you as Local Users and Groups manager is not available on them.
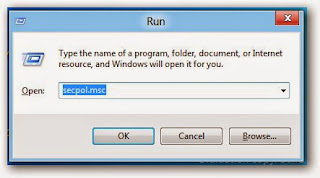
2. Type secpol.msc and press Enter. This will start the Local Security Policy Editor.
3. In the Local Security Policy Editor, navigate to Local Policies\Security Options.
4. In the work area on the right side, double click "Accounts: Administrator account status."
5. In the following dialog box, encircle Enable or Disable to respectively enable and disable the Administrator account.
6. Press OK. Log off to the login screen to see the Administrator account.
Local Security Policy Editor is not available on home editions of Windows.
To activate it, you need to use any one of the the following simple methods.
Important: It is recommended to only use this account for troubleshooting purposes and disable it once the task is complete. Even if you do leave it enabled, protect it with a strong password to prevent unauthorized access.
Enable/ Disable the Administrator Account Using the Elevated Command Prompt
 1. If you are on Windows 7, go to Start>Programs>Accessories and right click on Command Prompt and select Run as Administrator. Windows 8 and 8.1 users, search for CMD on the Start screen and in the results returned, right click on Command Prompt and select Run as Administrator.
 2. In the Command Prompt, type and execute the following command.
3. You should see a message indicating that the command was completed successfully.
4. Upon logging out, you will see the Administrator account available on the login screen.
Disable the built-in Administrator account
To disable the Administrator account, type execute the following command in Step 2.
This will disable the Administrator account and it will no longer appear on the login screen.
Enable the Administrator account using the Local Users and Groups Manager

2. In it, type lusrmgr.msc and press Enter. This will start the Local Users and Groups Manager.
3. In the Local Users and Groups Manager, click on Users in the left hand pane.
4. Then, in the work area on the right side, double click on Administrator.
5. In the following dialog box, uncheck the Account is disabled option and click OK.
6. Administrator account will be immediately available on the login screen.
To disable the Administrator account, check the "Account is disabled" option in step 5.
This method will only work if you are using Professional or Enterprise editions of Windows 7 and Windows 8(.1). If you are using home and basic versions of these operating systems, this method will not work for you as Local Users and Groups manager is not available on them.
Enable or Disable the Administrator account using the Local Security Policy Editor
1. Press Windows key+R to open the Run dialog box.
2. Type secpol.msc and press Enter. This will start the Local Security Policy Editor.
3. In the Local Security Policy Editor, navigate to Local Policies\Security Options.
4. In the work area on the right side, double click "Accounts: Administrator account status."
5. In the following dialog box, encircle Enable or Disable to respectively enable and disable the Administrator account.
6. Press OK. Log off to the login screen to see the Administrator account.
Local Security Policy Editor is not available on home editions of Windows.

